google-api-ruby-clientからGoogle Adsense Management APIを操作する方法
何をしたいか?
google-api-ruby-clientを利用して、Google Adsenseの収益情報を取得したい
概要(何が書いてあるか)
- https://github.com/google/google-api-ruby-client のサンプルを参考に、プロジェクトの作成の仕方から、認証情報の作り方、Adsense用のコード
どこにハマったか?
google-api-ruby-clientのversion 0.9以降の方法がなかなか見つからず試行錯誤した- 特に、認証周りがよく分からず、苦労した
最終的には、googleのサンプルコードをベースに作成することでレポート取得ができることができた。
手順
googleのサンプルをベースにAdsense用のコードを作成する。(「Adsense用コード」参照) https://github.com/google/google-api-ruby-client
以下の手順で’google-api-samples’コマンドを実行する。
- プロジェクトの作成
- API Managerで利用したいAPI(ここではAdsense Management API)を有効化
- 利用するAPIに応じた認証を作成
- ‘.env’ファイルに「3.」で作成した認証情報を設定
- google-api-samples コマンドを実行し認証
以下、README.md より抜粋。
Depending on which particular samples you want to run, different steps may be required. Some samples, like Pub/Sub, require a service account, others like Drive, Calendar, and YouTube require an OAuth Client ID. And in some cases like Translate, only an API key is needed.
- Create a project at https://console.developers.google.com
- Go to the
API Managerand enable the APIs you’d like to try - Go to
Credentialsand create the appropriate type of credential for the sample- For keys, use ‘Server key’ as the type
- For OAuth Client IDs, use ‘Other’ as the type
- For service accounts, use the ‘JSON’ key type
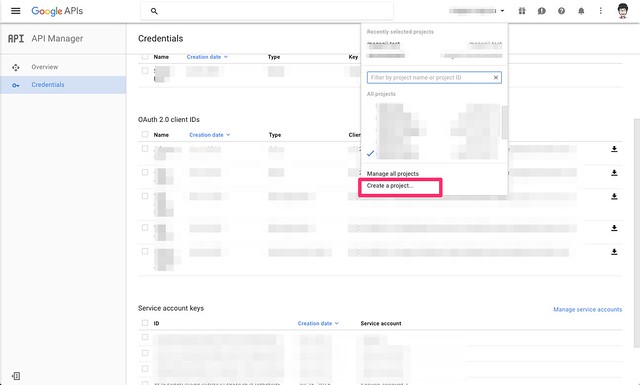
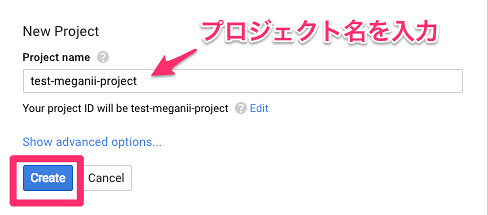
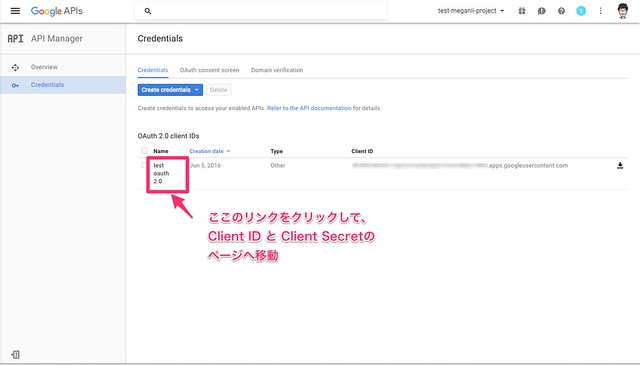
1. プロジェクトの作成
https://console.developers.google.com からプロジェクトを作成する。
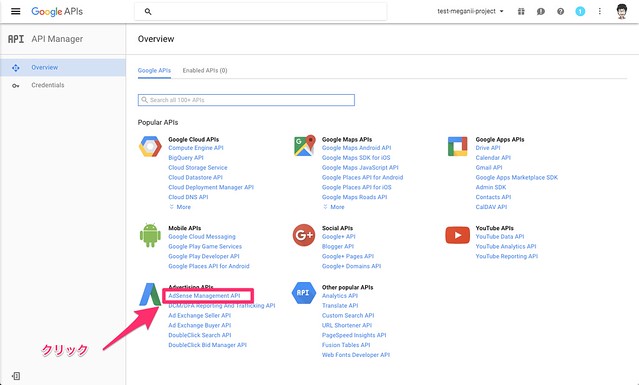
2. API Managerで利用したいAPI(ここではAdsense Management API)を有効化

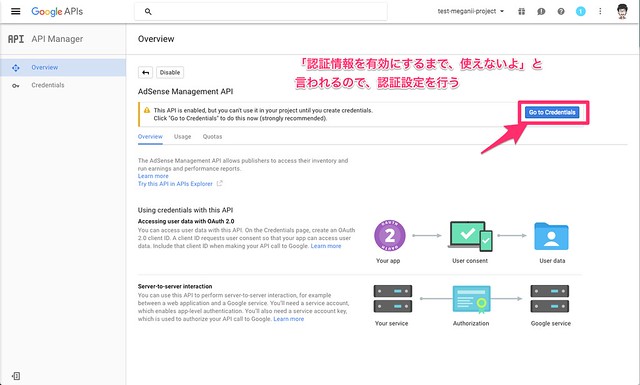
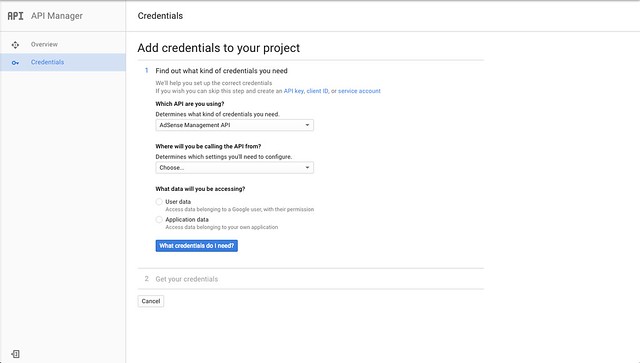
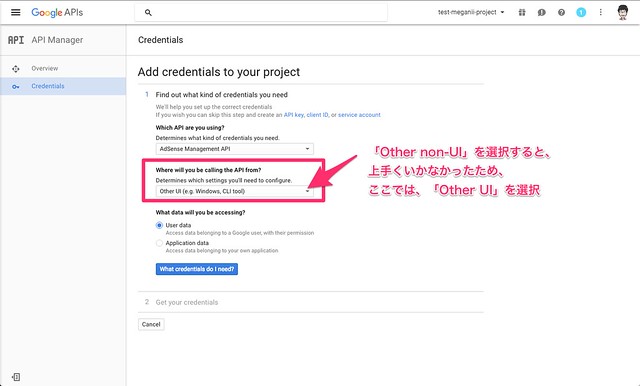
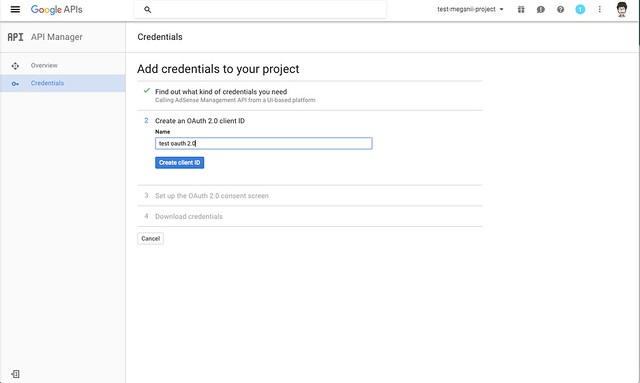
3. 利用するAPIに応じた認証を作成

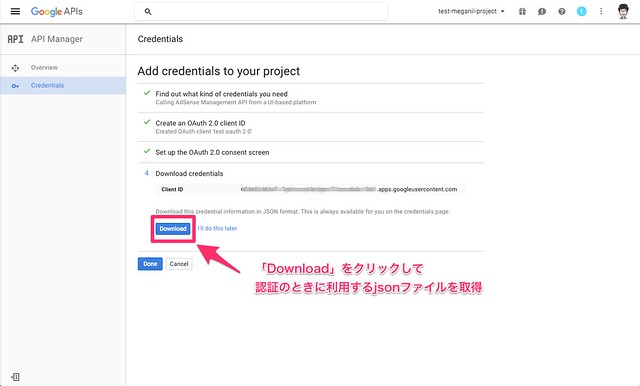
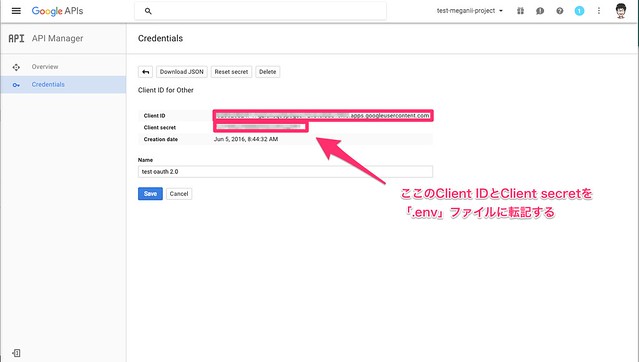
4. ‘.env’ファイルに「3.」で作成した認証情報を設定
‘dotenv’は、プロジェクト直下の.envを環境変数としてロードする。
先ほど、作成した認証情報のClient IDとClient sercretを書く。
GOOGLE_CLIENT_ID=CLIENT_ID
GOOGLE_CLIENT_SECRET=CLIENT_SECRET
GOOGLE_APPLICATION_CREDENTIALS=hogehoge.json
GOOGLE_CREDENTIAL_STORE=credentials.yaml
5. 5. google-api-samples コマンドを実行し認証
google-api-samples コマンドを実行して出力されたURLにアクセスして、認証を行う。
Adsense用コード
Google Analyticsのサンプルコードを参考に、Adsense用のプログラムを作成した。
# This software includes the work that is distributed in the Apache License 2.0

require 'google/apis/adsense_v1_4'
require 'base_cli'


module Samples
  class Adsense < BaseCli

    Adsense = Google::Apis::AdsenseV1_4

    desc 'show_report ACCOUNT_ID', 'Show report for the given adsense account ID'
    method_option :start, type: :string, required: true
    method_option :end, type: :string, required: true
    def show_report(account_id)
      adsense = Adsense::AdSenseService.new
      adsense.authorization = user_credentials_for(Adsense::AUTH_ADSENSE)

      result = adsense.generate_account_report(account_id,
                                                options[:start],
                                                options[:end],
                                                :metric => 'EARNINGS')
      puts result
    end
  end
end
参考
dotenv
環境変数を読み込ませる。
thor
コマンドラインインターフェース(CLI)のツールキット
- erikhuda/thor: Thor is a toolkit for building powerful command-line interfaces.
- Ruby の CLI ツールの作成を支援する、 thor gem の基本について。 #thor #ruby
Next Action
- OAuthの認証周りの考え方がいまいち完全に理解していないため、まとめる。
- ダッシュボード化を検討していて、以下のサンプルが面白そう ButecoOpenSource/dashboard: Status Dashboard